
I love playing around in Photoshop, so I thought it might be fun for me and helpful for you to start a series of cover design tutorials! I’m not a professional designer by any stretch, but I’m a pretty decent Photoshop hobbyist and I know how to make something that doesn’t totally suck, so why not? This one’s pretty simple, but it looks nice.
First, if you don’t have Photoshop, no problem… you can download an old version here for free (Legally! You’ll have to have an Adobe ID to do so; it’ll prompt you to sign up). This is Photoshop CS2, which is no longer supported or updated, but it gets the job done for a hobbyist. On the download page, they list the product keys you need next to the download, so when you’re prompted for one after install, just copy and paste.
Okay, let’s get started! I’m going to write this as if you have a basic working knowledge of programs like this, but if there’s something that confuses you, let me know in comments and I’ll try to help.
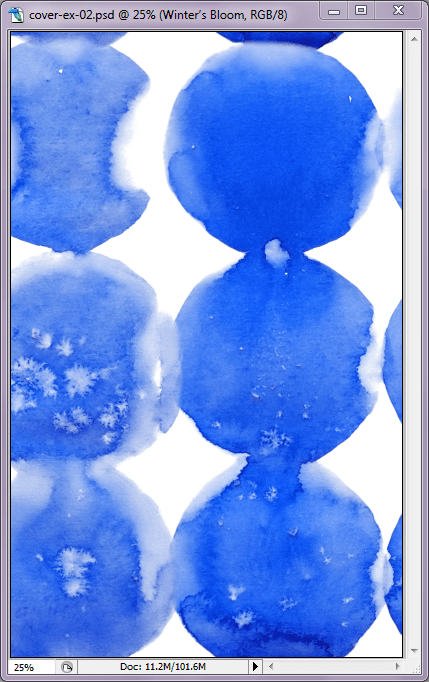
First, you’re going to need some sort of watercolor pattern background. You can find these on stock photography sites, or from graphic design element sellers like Creative Market, which I really like because they offer great bundles for good prices. Pretty sure that’s where I got this one. Make sure you’re using images and elements that are paid for and have a commercial use license!
Create a new image (File > New) and input the appropriate dimensions. It’s also a good idea to make it 300 dpi. Once you have your “cover,” drag the watercolor pattern image on top of it and resize/move it around until you’re satisfied.
Okay, this is the Photoshop CS2 toolbox. It’s a toolbar with all of the neat little tools you can use to create stuff. For now, we’re going to be using the Marquee and Lasso tools, which are the two in the upper left corner (Marquee is selected in the image below). It’s usually default-set on Rectangular Marquee, so you’re going to want to right-click and select Elliptical Marquee instead.

Now you’re going to open the focus image. I chose a wintry-looking girl from the site Unsplash, which is one of several sites that offer beautiful free hi-res photos with a Creative Commons Zero license, which means you can use them for pretty much anything (you can read about the license on their site).
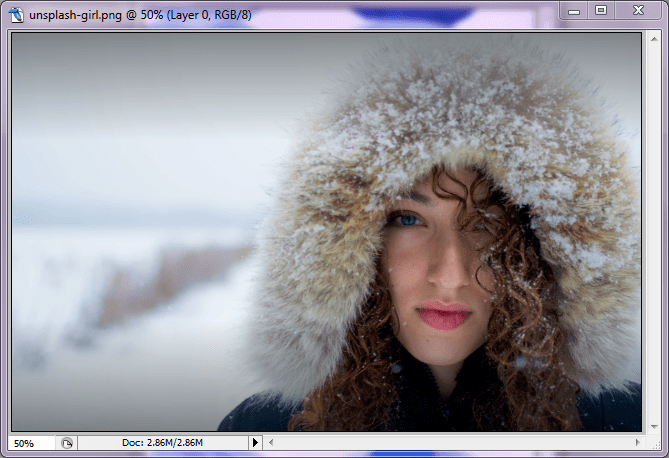
Use the Elliptical Marquee tool to drag a circle around the subject (hold down Shift while you drag to make it a perfect circle). Now select the Move tool (black arrow in upper right) and drag the selection onto your “cover.” Resize it as needed (Edit > Transform > Scale) and place it over one of the watercolor circles. I’m assuming you’re using a background similar to the one below, but you can obviously use other shapes or patterns for the same effect.

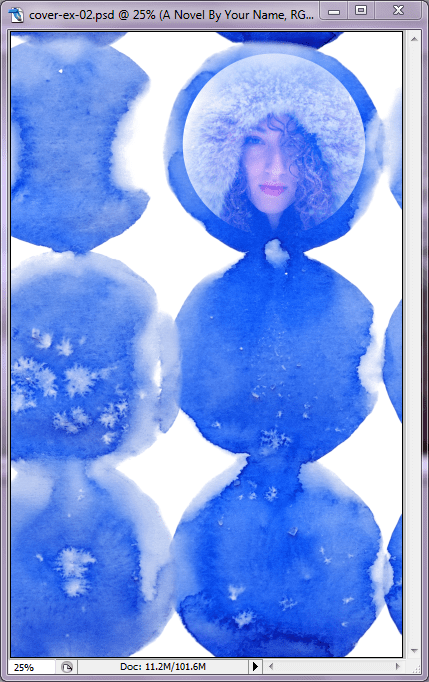
Now just set the image layer with the girl to “Screen” on the Layer Menu for a cool effect. The Layer Menu is the menu that shows you each layer you’re working with, and you can find the effects in a drop-down menu at the top of the tab. It should be set to “Normal” as default. Go ahead and play with the effects if you want to see what they all look like.
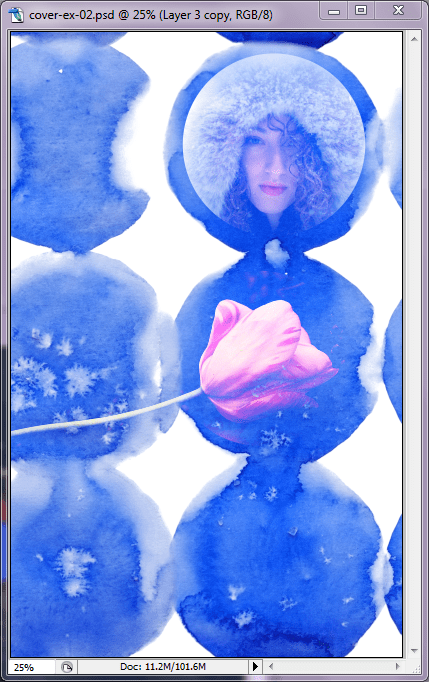
Cool! I chose another Unsplash photo of flowers for the second image. You can see it below. Now you’re going to use the Lasso tool on your menu to drag your mouse (or digital pen, if you’re lucky enough to have one) around the bloom and stem of the in-focus flower. Try to get as close as you can without cutting into it, but it doesn’t have to be perfect.

Use the Move tool again to drag the flower onto your “cover” just as you did before. From here, you can scale and rotate the image until it’s placed where you want it (Edit > Transform). You can also flip it horizontally or vertically if you like. Line up the bloom and stem so they’re over the pattern.

Now go to the Layer Menu again and set this one to “Lighten.” This effect brings out the lighter elements of the photo while blending the dark elements into the background. Pretty! Feel free to play with the effects again if you’d like. You may have to do some additional editing/erasing to get rid of the extra background.
Now for the title. Pick a nice font and use the Type tool to add your title! It’s a good idea to spend a little money for a nice-looking font. The one below is called Black & White Display. Again, Creative Market has AWESOME inexpensive font bundles.

With the Type tool selected, you can look at the menu bar at the top of the screen (or Font menu, whatever you have up) to change the font and add a warp effect (it’s the button with a “T” and a curve on it). I chose the “Bulge” effect (heh heh) and played with the settings until I had what I wanted.

Now add any additional text you need in a smaller size. For this one, the white was difficult to read because the background was paler, so I opted to right click on the Text layer in the Layer Menu, select “Blending Options,” and add a “Stroke” effect (heh heh heh) in blue to make it stand out more.

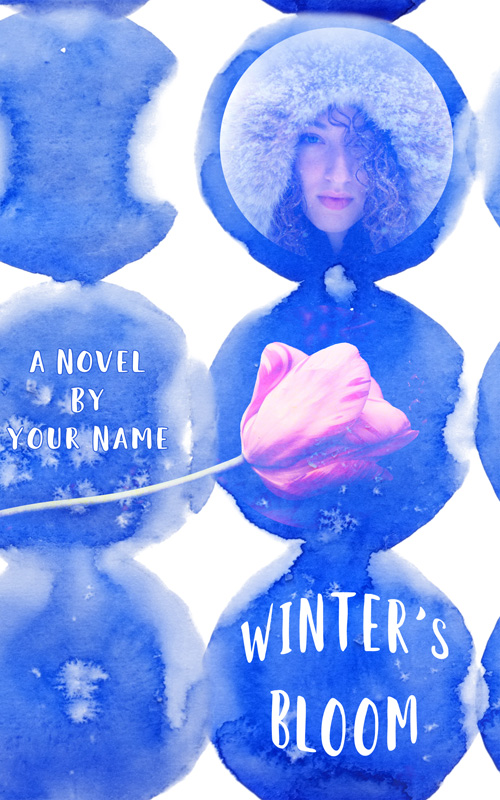
And… that’s it! You just made a nice, fairly minimalist cover. It looks clean, conveys a cool wintry feel, and will look great on your book. Yay!
Did you like this tutorial? I’m hoping to make more in the future, maybe by taking professional covers I think are cool and creating a similar effect. What do you think?
